
Back in June, we had a design challenge for the guild’s 2018 QuiltCon Charity Quilt. Cecelia Lehmann‘s design was chosen, though we’re going to put a bit of an improvisational spin on it.
Note in the diagram below: “Pick center to match one of the fan blades. Pick outer (background) to match a different fan blade.” [We are asking for the background to be white or off-white.] OR as shown, one of the blades can be ‘split’, consisting of both the center and background fabric. There is one other option, which will be shown in the tutorial.

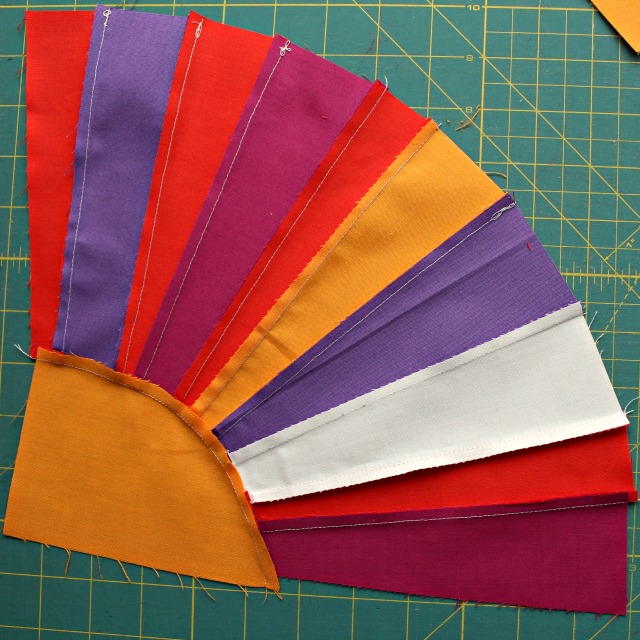
We’ll be using the color palette chosen by the Modern Quilt Guild, with fabric generously donated by Paintbrush Studio – beautiful Painter’s Palette Solids in (from bottom, below) White, Rice Paper, Purple, Tangerine, Tomato, Daisy, and Fuschia.

At our meeting last week, bundles were handed out. Contact Louise or Debbie if you’d like to participate – we have just a few bundles left.


Begin by cutting into one of your 6″ x 8″ colors. Cut a couple of spoke ‘wedges’ as shown below, cutting so they are 8″ long. Repeat for your other two 6″ x 8″ pieces.

Next, cut one 8″ long wedge from the end of your block center color. Set the large piece aside for later.


OR two split spokes – one using the background color and pointing to the background; another using the center color and pointing to the center.

Once your wedges are all sewn together, place a clear ruler over them to make sure they are at least as large as the 10 1/2″ block size we are after. I actually added one more spoke to the bottom, to give a little wiggle-room.

Once you determine your wedge section is large enough, slip the center piece underneath….


Flip your wedge piece over on top of your center piece, and start sewing from edge, easing in the curves as you sew. Sometimes it helps to stop your machine, lift the pressure foot, adjust your fabrics, then continue. It is not necessary to pin to fit the two curves together. It’s improv, and we’ll be trimming later, as needed.

Your sewn curve will be a bit ‘full’ and that’s ok!

Press seam up towards the wedges. Flip right-side up and press again.
Now lay your wedge shape on top of your background fabric, with the cut-out section hidden underneath. Place your clear ruler on top of your block and consider your overall block size.


Once again, place your clear ruler on top of your block and trim as desired to make a 10 1/2″ block.

And here’s a finished block!

If you have any questions, please contact Debbie or Louise. We’d like all blocks returned at the September meeting. Thank you!

What an exciting block!
We think so too! 🙂
These will look terrific together!
I think so too! I’m super excited!
I love this design and the improvisational
spin you are putting on it.
Thanks!
Pingback: Quiltcon 2018 Charity Quilt | seattle modern quilt guild·